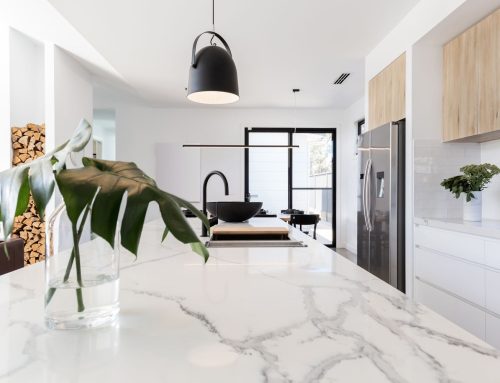
Quartzite countertops are a major upgrade — they bring durability, elegance, and long-lasting value to your home. But if you’ve never had stone counters installed before, the process may feel a little intimidating. Knowing what to expect will help everything go smoothly from start to finish.
Here’s a simple guide to the quartzite installation process — from template to final polish.
1️⃣ Pre-Installation: Measurements & Templating
Before fabrication begins, a professional will visit your home to:
✔ Take precise measurements
✔ Create a digital or physical template
✔ Confirm sink and cooktop cutout details
✔ Discuss seam placement and edge profiles
✔ Check cabinetry for level and support
This step ensures the slab is cut exactly to your kitchen’s layout — accuracy is essential because quartzite is extremely heavy and difficult to alter on-site.
2️⃣ Choosing Your Slab and Layout
You’ll select your quartzite slab (or slabs) from a stone yard. Because quartzite is unique by nature:
-
No two pieces are identical
-
Veining can vary significantly
-
Lighting affects appearance
Your fabricator may lay the template over the slab to position veining for the best look — especially for islands and waterfall edges.
📌 Tip: Bring a cabinet door and flooring sample when choosing your slab.
3️⃣ Fabrication: Cutting & Finishing Your Quartzite
In the shop, your slab is:
🔹 Cut to the template
🔹 Polished or honed (if not already finished)
🔹 Reinforced at stress points
🔹 Cutouts added for sinks, faucets, and cooktops
🔹 Edges shaped into your chosen profile
Common edge choices include:
-
Eased
-
Beveled
-
Bullnose
-
Waterfall miter for modern kitchens
Fabrication typically takes 1–2 weeks, depending on complexity and availability.
4️⃣ Installation Day: What Happens
Quartzite installation is exciting — your space transforms quickly. Here’s what to expect:
✔ Countertops delivered in large sections
✔ Old countertops removed (if included in contract)
✔ Slabs carefully placed and leveled on cabinets
✔ Seams bonded and polished for a smooth finish
✔ Undermount sinks mounted securely
✔ Appliances double-checked for fit
✔ Surfaces cleaned and inspected
Quartzite is extremely heavy — expect a larger installation crew than with lighter materials.
⏱ Most installs take half a day to a full day, depending on the size of your kitchen.
5️⃣ Sealing & Final Touches
Most quartzite requires sealing to protect against:
-
Stains
-
Water absorption
-
Oils and food spills
Your installer will typically apply a sealing product on-site and recommend when to reseal in the future.
You’ll get care instructions like:
-
Use pH-neutral cleaner
-
Wipe spills quickly
-
Use trivets and cutting boards
Follow these to keep surfaces looking new.
6️⃣ After the Installation: Cure Time & Inspection
You may be asked to:
-
Avoid placing heavy items near seams for 24 hours
-
Keep the area dry during sealer curing
-
Confirm final seam quality with the fabricator
Take time to examine:
-
Surface finish consistency
-
Seam alignment
-
Caulking around sinks and walls
-
Cutout accuracy
If anything looks off, speak up while the team is still on-site.
How to Prepare for Installation Day
To help the process go smoothly:
✔ Clear countertops & nearby surfaces
✔ Remove drawers under sink & cooktop
✔ Provide a clear path to your kitchen
✔ Ensure plumbing/electrical access when needed
✔ Cover nearby furniture and flooring
A little prep prevents damage and delays.
Final Takeaway – What to Expect During Quartzite Countertop Installation
Quartzite countertop installation is a well-coordinated process that includes:
1️⃣ Precise templating
2️⃣ Thoughtful slab selection
3️⃣ Expert fabrication
4️⃣ Careful installation
5️⃣ Professional sealing
6️⃣ Final quality inspection
When done right, you’ll be left with stunning countertops that last for decades and instantly elevate the look of your home.